Showing posts sorted by date for query outhouses. Sort by relevance Show all posts

Saturday, March 6, 2021

Woodland Scenics Details

Over the years I have collected quite a few of these metal detail pieces. I have made posts on a few, but there are many I have not. Most of them still remain unassembled and or unpaited. "So much to do, but so little time to do it."

Woodland Scenics

Scenic Details

part #

Description

201 20 Tombstones
202 Trackside junk
203 Crates, Barrels, and Sacks
204 15 Assorted Skids
205 Assorted Junk Piles (10 castings)
206 Assorted Mailboxes (7 castings)
207 Disc & Tractor (John Deere 1938-1946)
208 Seeder & Tractor (John Deere 1938-1946)
209 Aermotor Windmill
210 Plow, Disc, Horse and Man
211 2 John Deere Tracotor (1929 -1938)
212 3 Fuel Stands
213 Smokehouse
214 3 Outhouses and Man
215 Chicken Coop
216 Tool Shed
217 Service Truck (1914 "Diamond T")
218 Grain Truck (1914 "Diamond T")
219 Ice House
220 Daniels Outfitters
221 Pharmacy
222 Ticket Office
223 Gas Station
224 Doctors Office & Shoe Repair
225 Industrial Junk
226 Cats and Dogs
227 Bare Hunter
228 Motorcycles and Sidecar
229 Steam Engine and Hammer Mil
230 8 Vending Machines
231 Trackside junk
232 Trackside Scale
233 Diesel Fule Facility
234 Bulldozer
235 Motor Grader
236 Track-Type Loader
237 Gazebo
238 Back Hoe-Insley Model "K"
239 Rocky's Tavern
240 Flag Depot
241 Tucker Brothers-Machine Shop
242 Branch Line Water Tank
243 Tank Truck ("Diamond T")
244 Rural Sawmill
245 Flatbed & Tractor ("Diamond T")
246 Hyster Logging Cruiser & Tractor
247 Dump Truck (1.5 ton Federal)
248 Street and Traffic Lights

Tuesday, July 16, 2019

Buildable Details

I have two thoughts. The first, structures and detail pieces for model railroading have always been expensive, but have gotten even more expensive over the years. Secondly, I have loads of left-over bits of polystyrene and wood from previous projects. Why not put these bits and pieces to use? The following list is just a start. These details can be built from polystyrene, wood, or even paper board. These are small projects and you could possibly pop-out several of these pieces in one afternoon.

  • Coal bins
  • Outhouses
  • Sheds
  • Dog houses
  • Shop doors
  • Windows
  • Benches
  • Desks
  • Tables
  • Chairs
  • Storage shelves and bins
  • Rectangular tanks

Tuesday, January 9, 2018

Miniature Outhouse for your Miniature Population, #6

This is number six for my shack collection posts. I don’t know the manufacturer of this out-building, but it was a very easy to build.


To a set of outhouses

Wednesday, November 11, 2015

General Directions for Woodland Scenics Metal Castings

  1. Clean-up castings by removing parting lines, flash, and stems. These can be removed by scraping with a hobby knife, filing, or using sand paper. I prefer filing, but in certain cases a hobby knife must be brought in to play.
  2. As you are cleaning up the castings, refer to the directions and become thoroughly acquainted with their placement. Dry fit the parts before you start construction.
  3. Parts may warp or become bent during shipment and should be straightened before construction. Be careful here, you don’t want to break those fragile parts.
  4. Clean the casting with solution water and a little dish liquid and let air dry.
  5. After the parts are thoroughly dry, I use a tweezers to transfer the parts to a piece of two-sided tape, and I then give them a good base coat. I usually use grey spray paint, but white will work.
  6. Glue castings. I prefer “Super” glue, but a fast acting epoxy will also work. The detail I like about “Super” glue, is that it will adhere to a painted surface and it acts fast. When using a fast acting epoxy, both surfaces must be free from paint. By the way, if the part is going to receive some handing during play, then use epoxy. Epoxy will take a little longer to cure, but will produce a stronger bond.
  7. Paint the castings. Pick out details on the castings with contrasting colors. Some parts might be better served if they are painted before construction.

I have worked with many of Woodland Scenics Metal kits. Some like the outhouses have worked out very well, while others like the chicken coop did not go together without some difficulty.

Monday, August 19, 2013

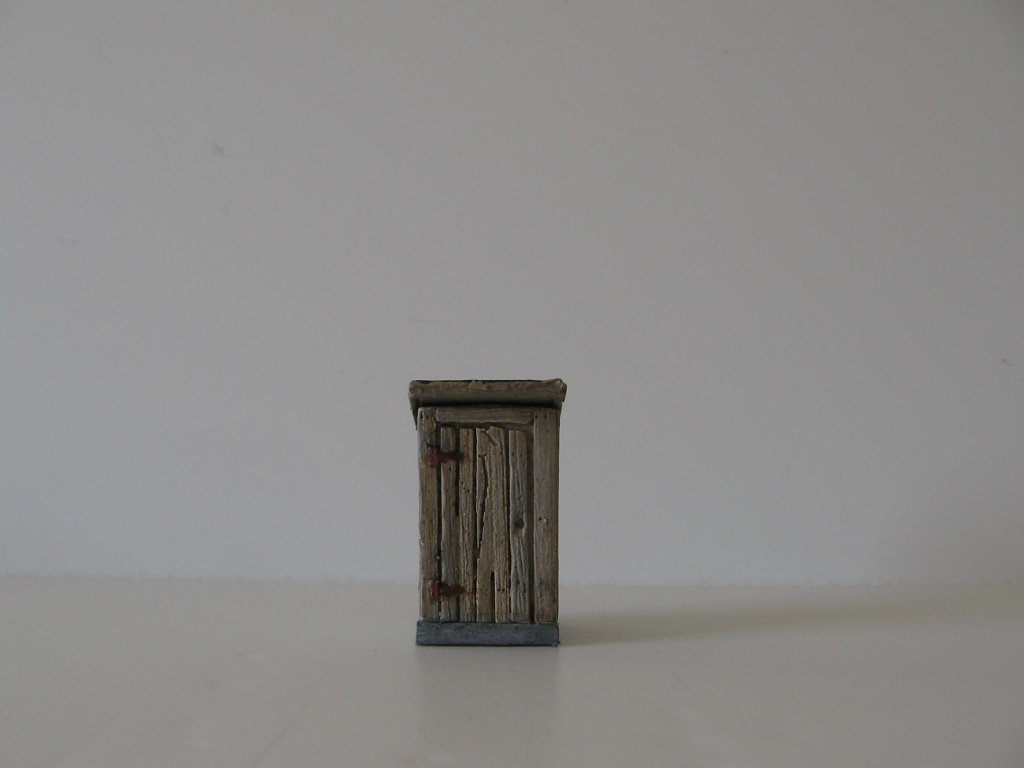
Building a Woodland Scenics Outhouse or Two

I enjoy building metal kits. Metal kits have a certain heft and they are constructed ruggedly. Woodland Scenic’s Outhouses kit comes with three individual outhouses. I built the two identical outhouses. The third is more detailed, and I thought I would save this structure for another time.

There were three castings for each of these structures, front, back sides and the roof. I used a file to true-up the edges and to remove casting residue I soaked the parts in denatured alcohol and let dry. Using the cheapest brand I can find I primed the castings (front, back, and roofs) with flat white spray paint.

I let the primer dry thoroughly and then dry fitted the pieces together. After I was satisfied with the placement of these parts t I used a Cyanoacrylate to glue the front and back sections together. I then gave one outhouse and roof edges and front and back a basecoat of Americana Barn Wood, and the other rebasecoat of Folk Art tan. I have been using these very economical water based acrylics for just all my painting needs. Just make sure that you apply these paints over a good base coat.

I was trying for a weathered old paint look on the one structure, so the Barn wood colored outhouse got a dry brushing of light grey. I used two separate applications of the grey paint. After this had dried I painted the door hinges a dark grey and gave the structure a couple washes of a black wash (alcohol and India ink-Two tablespoons of ink to a quart of alcohol).

The roof tops for both models were painted back. To give the tar paper some texture and while the paint was still wet I sprinkled black and dark gray chalk. I was trying to create a perceived randomness so I varied the placement of the black and grey chalk over the area of the roof.

The other outhouse, the one I painted tan received a couple washes of Folk Art oak stain. The wash consistencies were varied. I used one stronger wash and diluted this wash down with some more water and gave the structure another wash of oak. After this had dried I painted the hinges a rust color and gave the structure a couple good black washes. Not really being satisfied with the outcome I dry-brushed this structure with some barnwood.

I added foundations to both of the outhouses. I like the texture of wooden match sticks, which when painted and dry brushed can be perceived as a concrete foundation. I started by cutting the front and back pieces and then fitting the side pieces in. I painted the foundation a dark grey and after this was dry I dried brushed the foundation with a medium gray followed by a dry brushing of light gray.

I added a field stone foundation to other outhouse. I created this from piece of field stone sheet cut to height of a styrene strip. I gave this a grey base coat and dried brushed it with burnt sienna.


Another sample outhouse can be found here.