
I used 3 by 5 file cards for the boards and cut them from 3 to 14 inches wide. I used a file card to add wood grain and a hobby knife to add a few knots. I need to go back clean up some of the window opening.
I used 3 by 5 file cards for the boards and cut them from 3 to 14 inches wide. I used a file card to add wood grain and a hobby knife to add a few knots. I need to go back clean up some of the window opening.
I am using bristol board for the sub-walls. The building will measure a scale 12 foot square. Randum width boards will added to the subwalls. The walls will be nine foot tall.
There will be two doors and six windows: front and back sides get a door and a window; the sides will host two windows per side. Four triangles will be cut from the bottom sheet. These triangles will measure thirteen foot across the bottom and will be six foot tall.

Wall sections and material for roof sections.

"You can never have too many small structures on a model train layout"; well we are going to test that one out. I found this kit on ebay and for a good price.I am looking forward to seeing just how much weathering and aging I can do to these sheds and shacks. If the illustratios can be trusted there seems to be a few details I am looking forward to seeing.

Although all of the structures are of board and batten construction they feature different types of roofs and there are two stove pipes included.

Although the three sheds are all small they come in three sizes.

There are many details like two set of fense, a turn-stile and another item that I am not quite sure what it is. Perhaps it will make a little more sence once I have built the item.

All in all I am am happy with the three structures. I only have a place for one of the structures so far, but these shacks will all have a place eventually.

I found this Heljan kit in storage, and looking for a quick build for an empty spot on my layou I have decided to build it.

I am often challenged when I see a pile of left-overs from previous modeling sessions. I use the following materials to build this shed: 1mm grey cardstock measuring approximately 4.5 X 4.25 by 7' scale feet, matt-board, small bits of corrugated material, 8 pieces of small sticks for strengthening the interor, and several passes from a dry brush.

It is not one of my better attempts, but it will work stuck behind some structure away from the front of the layout.

I found this template or is it a prototype? I am not sure what type of material I want to use. I could use some of the scribed board here. The width of this piece is a scale ten feet in HO. I dug up three matching windows and I will construct a door for the structure. I have multiple options for roof material.
It sounds like the DirtSpot.7 HOn30 layout is in flux, infact I didn't see any locos on the layout at this time. However, the layout features plenty of structures, many of them scratch built. I do appricate the many signs of dirt and decay where I got more than a few ideas for my own structures.
More on ...

Terence and Percy's Home (Hobo Shack #2).
Simple construction: wood sticks, random bits of paper, amd a small piece of embossed brick sheet. That is as far as I have gotten.

Here is the first of three or four "hobo" shacks for the Village. It is made made from bits and pieces from my scraps collections, namely my paper, wood, aluminum, foam-core, and mat board collections. It is a grand thing to see these leftovers being utilized.


I dumped my scale panels that I had formerly had in a perscription bottle to a bank envelope. This will take up less space. I have been using these envelopes for my bits of usually paper leftovers. There are also great when collecting bits for the next project. I am currently building another structure for the "village" and these panels are being added to a large storm drain pipe (a flimsy cardboard tissue core) to add to its overall structure and to add detail.

Particle plan of structure. Missing is the part of the stone foundation that has been formed out of foamcore.
Also on my workbench is another structure for the Village. It is receiving panels on top of its storm pipe core.


The structure is built around a cardstock core where the second ply received the stuko treatment. The stuco was created using 1 part baking soda, 1 part white paint, and 1 part white glue. I beveive that I used too much baking soda, so perhaps I shouod have used on 1/2 part baking soda.
The roof is in a Barrel-vaulted configuration. And was built from a piece of Bristol Board, strips of masking tape and then painted with a "soft-black" paint. I then dry brushed it with another softer black and applied some chalk.

The roof vent started its life as a part from a lighter.

Although you cannot tell by looking at the picture this 8 by 10.5 foot (1/87) scale roof is painted grey with a bit of rust and was created for a small shack. Where the shack is, if I even built one, is anyone's guess. I will just have to build a new one. The shack, the future home of Jack the beekeeper, will measure 12 by 12 scale feet. And of course with an addition of the covered 8 by 10.5' porch. The structure will be built from wood. I haven't decided on the roof type yet.

This one is my rendition of a rubber roof for my building in stucco. I am trying for a barrel roof here and it has not been without some experimention. I am not happy with how the current version and want to exstend the sides another six inches.
I have just about completed another shack for the village. This time I wanted to try something I haven't done before and decided to build a stucco structure with a rubber roof. I two pieces of trim to adhere to the structure and I am looking forward to giving the structure a stucco like treatment. Here are a two resources I referred to before getting started:

The swamp shack sits atop of its new deck. The deck I had originaly created was much too small for the hut. The shack needs some pilings and a couple of columns under the overhang of the porch. It has taken me a long time to complete this structure.
I had hoped to had completed this project by the end of this month (Oct.), but it seems I will not. Although the shack nears completion it still needs soome attention.

However, it is time to layout the roof sections. The roof will over-hang the front entrance by up to five feet. Perhaps I didn't need to do so, but I added bits of textured cardstock sheet to two inside walls, just in case the interior is viewable from its location on the layout.

Although this structure still requires a few tweeks I have went on to the second phase, the roof. The roof will over-hang the front, creating a porch like area.

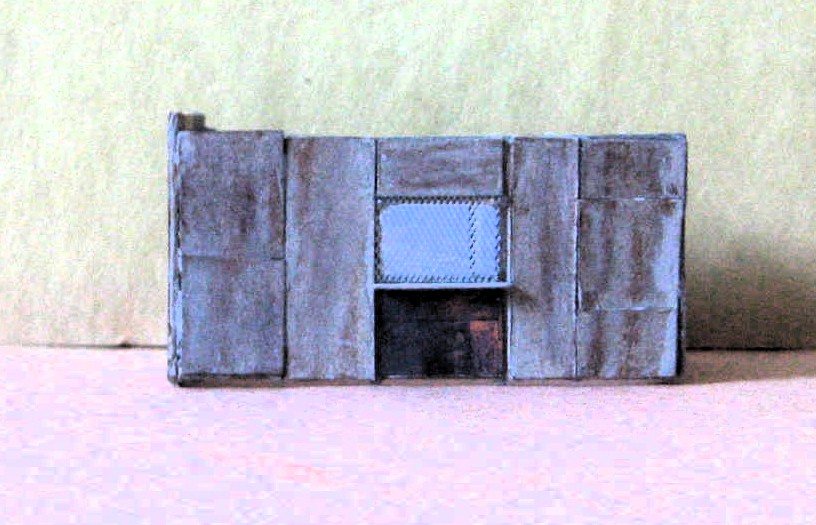
View of left-side. This structure might have been built from one type of material, but over the years the owners used whatever materials that were at hand: plywood, corrugated and steel panels, wood boards, even some tarpaper sheet.

Back
And the right hand side

The basic dimensions for the shed are: 12 x 9 x 15' tall. The structure's subwalls were built from cardstock and I used some bassword strips on the interior to keep the structure from warping and to strengthen the overall build. I usally use white glue, but for this one I used sticky glue as an adhisive.

Side view
I used black construction paper to represent tarpaper, but to a scale 3 or 4 foot. THe battens are from my scale lumber stock. I believe I used 1 x 2 for these. The door was built from cardstock and the trim from my scale lumber stock.
The roof consists of a card stock subroofing and corrugated cardboard which still needs to painted and weathered

Back view. I didn't make the structure too dilapidated in fact, besides a broken and missing battens it doesn't look like it is in disrepair. Who knows what the structure will like the next time we visit?

Having to build a roof for the tarpaper shack, I've been on the look out for materials that purpose. Here are those materials, a piece of sturdy carbstock for the sub-roofing and corrugated cardboard for the actual roof.
Previously: Orphaned Roofs

Wanting to make use of the roof on the left I built a tarpaper shed, something I have wanted to do for some time, so I measured the roof and dimensions and hoping I had the correct measurements, on to the material I was using for the subwalls, but once I had completed the structures wall treatment, the roof wasn't fiting.
So alas, I am in the process of creating a new topper (roof) for the shed. Not that I mind, I like retro fitting.

Front view of the tarpaper shack. More on its construction when the structure has been completed.

Back view.
Previously: The Trouble with Retro-fitting
I will see you all next month.